
28 December 2011
21 December 2011

14 December 2011

09 December 2011
ginger cookies with chocolate and apricot

 Today's post is brought to you in part by the wonder bloggers/organizer extraordinaires Lindsay of Love and Olive Oil and Julie of the little kitchen. These two came up with a genius idea: The Great Food Blogger Cookie Swap! What this means is that in the past week or so over 600 bloggers were elbow-deep in flour making cookies for fellow bloggers. In total, over 22,000 were to be delivered. For me, it was a total success: I sent out a dozen of these here ginger cookies to three other bloggers I don't even know, and in return I got a dozen cookies each from three different bloggers. It was an exciting week to get home from work and check the mail. :) I mean, do you know how much I like cookies? I didn't realize what a cookie monster I was until I made the tag cloud for my blog (check out the right sidebar! --->) and realized the two biggest entries by far were soup (duh!) and cookies! More about this brilliant swap later in the post...
Now for the super bizarro story of how I got these cookies made on time. I dropped my husband off at the airport as he headed off to a conference (*cough cough* *nerd summit*), then picked up a few things at the store on the way home. I settled in to get the cookies made. Christmas lights were on, festive music in the air, fuzzy slippers on, oven preheating... I totally had my evening on schedule. I started throwing the dry ingredients together, and then I hit a serious road block: I needed ginger. Not just fresh ginger, but also dried ginger. Craaaaaaap.
So here's the thing: it had snowed recently. I hate driving in the snow. I didn't want to go back to the store -- I needed to get a run in before dark, and I sure didn't want to be late for my first appearance at an event with the Minnesota Food Bloggers -- the very first Big Veggie Night! Conveniently, the two closest grocery stores to me are two lovely coops that sell bulk spices. I turned off the oven, tossed on some running clothes, grabbed some laundry quarters, and was out the door before my dog even realized what was happening.
 |
| Just add flour, sugar, ginger, more ginger, butter, love, and SWEAT. |
Cashier: "What do we have here?" (shakes the bag like a dirty tissue)
Me: "Ginger." (with rosy cheeks, in black spandex running ninja gear, slush melting off of running shoes)
Cashier: "And what are you going to make with your ginger?" (big smile)
Me: "Cookies." (places handful of quarters on the counter)
There were some dimes and pennies left behind in this transaction, but hey, I got the cookies in the mail the next morning, I got to go for a run (with extra purpose!), and I made it to dinner on time.

Every so slightly tweaked from Heidi Swanson's cookbook (obviously!), Super Natural Every Day
for one batch/48 small cookies
1/2 c. turbinado sugar
6 oz. bittersweet chocolate
1 c. spelt flour
1 c. whole wheat flour
1 t. baking soda
1 1/2 T. ground ginger
1/2 t. kosher salt
1/2 c. butter, cut into 1 T. pats
1/4 c. blackstrap molasses
2/3 c. granulated sugar
2 T. grated fresh ginger
1 large egg, well beaten
1 c. dried apricots, cut into bitty cubes (pea sized?)
Put the turbinado sugar in a small bowl. Chop the chocolate into 1/8 inch pieces. Don't worry if they aren't uniform; it's exciting when you find a big chunk in a cookie! In a large bowl, whisk together the flour, baking soda, ground ginger, and salt.
Heat the butter in a saucepan until it is just barely melted. Stir in the molasses, fine-grain sugar, and fresh ginger. The mixture should be warm, but not hot. Whisk in the egg. Pour this mixture over the flour and add the apricots. Stir until barely combined. Stir in the chocolate. Chill for at least 30 minutes (over dinner, perhaps?)
Preheat the oven to 350 F with racks in the top an bottom third of the oven. Line two making sheets with parchment paper.
Scoop out the dough in tablespoons. Tear that ball in half and roll each piece into a ball. Roll each ball in the dish with the turbinado sugar and place on the cookie sheet. Bake the cookies, two sheets at a time, for 7 to 10 minutes. They'll smell done, but also be puffy and the bottoms will be darkened. Don't worry that the cookies are still a bit mushy, they'll set as they cool. Let them cool a bit on the pan to firm up, then transfer to a wire rack to cool completely.
----------------------------------------------

Top: Chocolate Cherry Nuggets from Backstage Balance
Bottom Left: Puerto Rican Shortbread Cookies from La Casa De Sweets
Bottom Right: Buckeye Cookies from Lace, Etc.
07 December 2011

06 December 2011
butternut squash and chickpea stew with israeli couscous
 |
| SHOO FLY PIE: It's real! |
Well jeez, there's a lot to recap here. Let me begin with a belated Thanksgiving-themed aside. I mean, giving thanks should not be a seasonal gesture. But this post does involve squash, cinnamon, and cranberries, so it probably has a hint of seasonality to it anyways.
I went back home for the entire week of Thanksgiving, and I think the best way to summarize the trip is to be thankful for a large number of people, places, and opportunities. I am thankful for quality time with family. For getting to have a little chat with my great grandfather. For running a 5k with my sister. For the memories and stories shared while browsing my great grandmother's jewelry. For old friends, especially when hanging out is just like it used to be. For random care packages full of apple butter from lovely people. For cooking with old pals and teasing a corgi. For the beauty of the Valley and Ridge. For the continued growth of my favorite hometown market. For the store that employs grandmas to bake their shoo fly pies just right. For my three year old nephew, who distracted everyone from my weirdo veggie sausage at the Thanksgiving dinner table with his bowl of cereal with a side of hot dog. :)
And on a less vacation-y note: I am thankful for my husband, who loves and encourages me 110%. I am thankful for my cat's continued antics and my dog's ability to melt my heart at least a hundred times a day. I am also thankful for my job, where my co-workers make it fun every day, even though we work in a sunless dungeon. And thanks to you, for reading my blog!
Now I will talk to you about some soup, because we all know I love soup. Well, I guess it is more of a stew... woo variety? :)

This recipe was first made possible by the thoughtful nature of my sister in law. Backstory: there was a totally amazing cold salad served at my wedding with israeli couscous and grapes in it. Since she's a whiz in the kitchen, my darling relative went home and recreated it. Once she sent me the recipe, I was all about making it. There was one problem: I could not find the giant couscous anywhere! Cue the care package full of couscous. My hero! I believe it is now available at one of the more upscale grocers in the area, under the name of pearl couscous. So go make some tasty stew full of seasonal goodness. If you can't find the cute couscous, I recommend orzo or ditalini (a favorite pasta in our kitchen -- it's so cute!). We also make this with dried cranberries, but I'll bet dried cherries are super amazing too. I think when I grow up we'll be sure to serve this at our Thanksgiving dinners. :)
14 November 2011
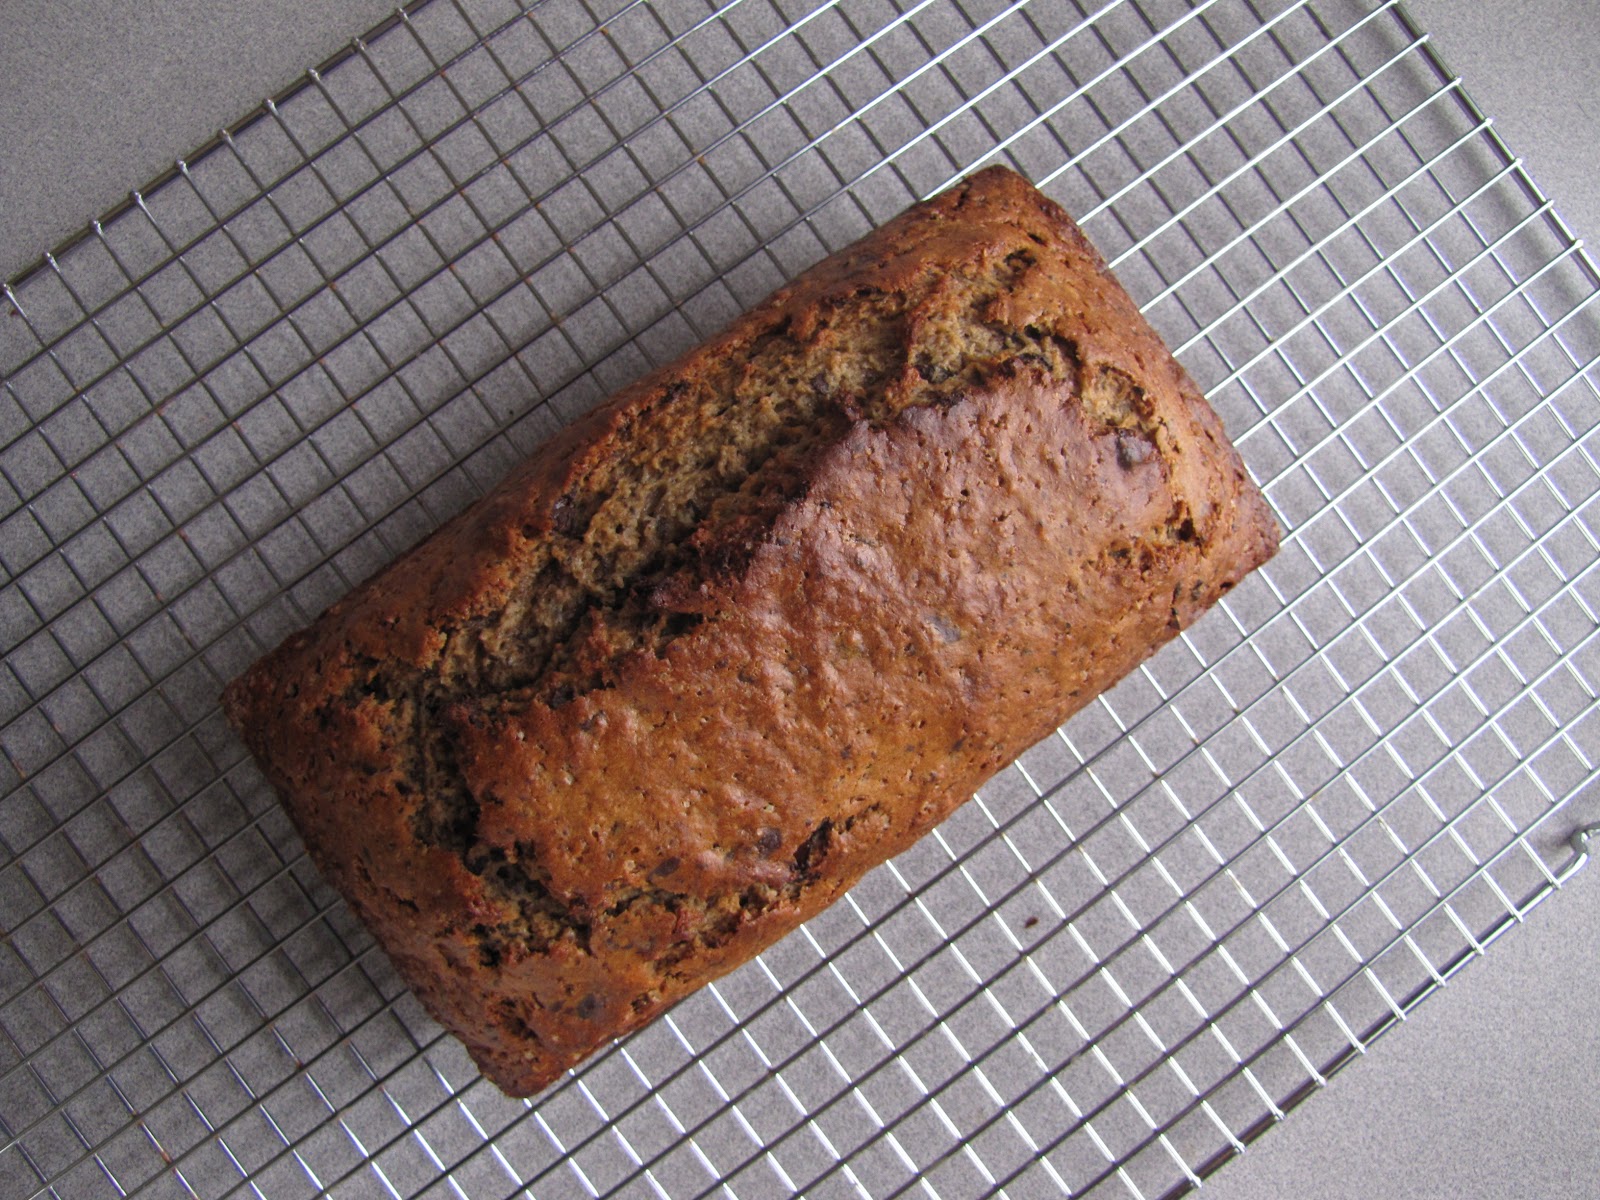
lemon and olive oil banana bread
Banana bread for grown-ups! Smells sophisticated! You know, you're leaving town in a week, but there's three overripe bananas and what with Thanksgiving coming up, you'd really rather not grab a stick of butter. Personally, I am not a fan of glaze on quick breads even though it is called for in this recipe. I like that they aren't as super sweet like cake with frosting. But that's me, and it took me until I was in my 20s to appreciate cake with frosting. Not like that would have anything to do with the fact that I live four blocks from a cupcake bakery, nooo.... Ahem. Back on that train of thought that was originally steaming full speed ahead, I wouldn't be opposed to a sprinkling of turbinado sugar on top next time for some crunch. And there will so totally be a next time.

Also, a quick note on types of chocolate, and ingredients in general really: if you don't know which kind is which, you should get over yourself and Google it. I used unsweetened chocolate in this, and it was fine, but I promise that you want semisweet for maximum goodness.
roasted miso curry

If you are looking to prepare more colorful meals, I suggest you give this a go. This was definitely one of those times where I wanted to pat myself on the back for having such a fun-looking dinner. In college my boyfriend (now husband!) challenged me to eat more colors since I was a very beige-centric eater. Weird how things change sometimes, eh?
So this past weekend I took a cooking class for the first time ever (Thanks, Mom!). I assume high school HomeEc doesn't count, right? I took a lovely class entitled Delicious Mediterranean Vegan, as instructed by chef Robin Asbell. I figured I wanted to take a class on a) something new that I don't already make all the time, and b) something I could eat. So that ruled out all the classes on soups and cupcakes. Knife classes could be useful, but mostly involved carving (then eating) meat. Wine tasting classes were too expensive. Baking bread is something I'm pretty comfortable with by now. So why not vegan? There's nothing bad or wrong or gross about plant-based food. In fact, my favorite part of the class (beside eating super tasty food, duh!) was learning super cool vegan nutrition facts. I think by necessity vegans are some the most knowledgable folks when it comes to nutrition. Robin often started with "Sorry this is boring, but..." before she went into nutrition/food chemistry stuff, but I loved it! The whole class felt like a conversation with her, and she told us lots of funny stories about being a vegan. As a vegetarian, I am totally familiar with some of the most annoying classics -- everyone thinks you're weird, there's always that one person who can't give it up/teases you relentlessly with hamburgers, getting really tired of people asking "but where do you get your protein?!"... and so on and so forth. Therapy.
During the class, I often found myself thinking, hey, I could totally do this! I love cooking for people. I love researching and experimenting. Such a scientist, I know. But one of my major hang ups about being a geoscientist is that I don't think I help people enough. I fell in love with my college over the recruiting campaign slogan "Think One Person Can Change The World? So Do We." The students are all passionate about something, and making the world a better place. I don't think I do enough of that. Sometimes I think I should have been a nutritionist or a food chemist. For now, I blog, and I hope I get people to try making themselves some good real food. :)
One more thing! I found out during class why onions make you cry! It turns out there are sulfur compounds released when you cut into an onion. Once they are airborne, they mix with the water in your tears, and BAM! Sulfuric acid in your eyeballs! Ahhh! Don't you feel so validated?! I always thought I was a total wuss and that one day I'd get used to it. No dice. It hurts like crazy every time. In fact, cutting onions even makes the cat cry, and he has three eyelids per eyeball, so I am so not the wuss here. Solution: I will continue to look super cool wearing my Onion Goggles in the kitchen, and otherwise be confused about why it doesn't hurt when I'm wearing contacts. But let's get serious here, I never wear my contacts. Glasses are way, waaay, cooler.
Enough of my stream of consciousness spouting forth at you. There's a dinner at stake here, yes? This recipe calls for pepitas. Don't let this fool you; these are just simple raw pumpkin seeds. I was all "oh, I don't know what that is, and I am ashamed, so I will just go ahead and use these pumpkin seeds here. Those will toast up nicely." Then I Googled it later. Now you can scoff at the gourmet word with me, and just call them pumpkin seeds, dammit. Maybe next time I will overcome my fear of asking someone at the coop if they really don't have any delicata squash. I get very shy while shopping at the coop for no really good reason.
Roasted Miso Curry
adapted from Miso-Curry Delicata Squash, yet again from Super Natural Every Day
12 oz. butternut squash
1/4 c. olive oil
1/4 c. white miso (of the fifth taste, umami. I will leave you with this to blow your mind.)
1 T. red curry paste
12 oz. extra-firm tofu (frozen and then defrosted, trust me, it is worth it!)
5 small-medium-ish purple potatoes, unpeeled, cut into ~1 cm cubes
2 T. fresh lemon juice
1 1/2 cups kale, stems removed, then cut into ribbons and cooked
1/3 cup toasted pumpkin seeds
oodles of cilantro, to taste/tolerance
1. Preheat the oven to 400 F with a rack in the middle of the oven.
2. Peel the squash. Cut the squash in half lengthwise, then cut the halves again lengthwise (so now you have long quarters). Cut these pieces in 1/2 inch slices to make lots of little curved wedges.
3. In a medium bowl, whisk together olive oil, miso, and curry paste. Combine the tofu, potatoes, and squash in a large bowl with 1/3 c. of the miso-curry paste. Turn the vegetables onto a rimmed baking sheet and arrange in a single layer.
4. Roast for 25 to 30 minutes, until everything is tender and browned. Toss once or twice along the way, after things start to brown a bit. Be careful not to burn anything.
5. In the meantime, whisk the lemon juice into the remaining miso-curry paste, then stir in the wilted kale until coated (it soaks up the lemon juice in a very delicious way! I'd also recommend using this time to toast your seeds too.)
6. Toss the vegetables gently with the kale, pumpkin seeds, and cilantro. Enjoy! You'll always want your tofu this way for ever and ever.
**This recipe is an example in being a sneaky vegan: Don't tell anyone that you've cooked something vegan until after they ate it. Or just don't say anything. I totally pulled this on my husband a few days ago. Sneaky!**
06 November 2011
roasted chickpeas

Problem: We're runners. We eat a lot. Often we don't get around to dinner (sometimes even starting it) until 8. There is only so much yogurt you can consume in a day. Bagels aren't really even exciting anymore. Trust me, if you were on a college cross country/track and field team, you've had enough cold bagels with peanut butter to last a lifetime. *shudders at the thought*
So I'm on a campaign to make more interesting snacks to keep around the house for post-workday snacking. I do plan to give kale chips a try since a buddy of mine sent me the recipe (and I keep reading about them all over the internet!). Said buddy also deserves a shout-out for exporting some apple butter to me from my hometown... I love that I've got oodles of it and I haven't had a chance to visit my favorite orchard myself in a good long time. :) But yeah! If anyone else has some fun ideas, please let me know!
This finally, eventually, brings me to what I've got for you today: roasted chickpeas! The only bad thing about making these is that I only made a half batch (I was limited by the volume of chickpeas at hand. Alas.), and I made them right after a gleeful eight mile run... so now I wouldn't really mark us down as 'stocked'. :) What I mean to say is, you should probably try these out. They're awesome, and they are another way to use chickpeas that isn't making hummus. They also remind me of when I did field work in central Turkey. The field team stayed in a little mom and pop hotel in downtown Eskisehir. My hotel room window was above a little convenience shop that had a roaster full of chickpeas going at all business hours. It smelled amazing.
You probably won't be surprised to hear this is yet another creation from Super Natural Every Day. I'm telling you, it's one of the most innovative, yet practical cookbooks out there for vegetarians.
Roasted Chickpeas (with my comments)
3 c. cooked chickpeas (if you're using canned, be sure to get them as dry as you possibly can. Seriously, dig out the salad spinner!)
2 T. olive oil
1 1/2 t. sweet paprika (I didn't have this, so added ancho chili powder instead on a whim)
1 1/2 t. smoked paprika
1 1/2 t. hot paprika (didn't have this either, so I added a pinch of cayenne for funzies)
1/2 t. fine-grain sea salt (kosher salt worked fine)
zest of one lemon (if you're feeling ambitious...)
1 t. fresh rosemary (I used one big pinch dried and crushed)
1 t. fresh thyme (same as the rosemary)
Preheat the oven to 425 with a rack in the top third of the oven. Pour the well-drained chickpeas onto a rimmed baking sheet in a single layer and roast for 10 minutes. Shake the pan and rose for another 8 to 10 minutes, until the chickpeas crisp up a bit. Keep a close eye on them to avoid burning, particularly if you think your oven runs hot. In the meantime, combine the other ingredients in a mixing bowl. Carefully transfer the chickpeas to the bowl and toss until well coated. Return them to the baking sheet and roast for another 3 to 5 minutes, until fragrant. Let them cool before serving.
Next time I'm totally going to make these chickpeas with za'atar, because I love using it whenever I can and I'll bet this would be a good opportunity to do so. I might even zest a lemon for it, and that means I'm seriously committed.
20 October 2011
rosemary parmesan foccacia
Hey everyone! Guess what? I've been blogging for a whole year now! Today is my one year blogiversary, as observed by my first recipe post (my first post totally does not count, since it was more of a "uhhh, is this thing on??" *taps mic*). Who knew some random hobby of mine would last so long and that I'd like it so much! Honestly, I'm still a shy blogger. I'm really just starting to put myself out there, and it really takes just the right moment (wine?) for me to even confess to my friends that I have a food blog. I'm still really nervous about it, but I keep posting and folks seem to keep reading it (Gotcha! You folks preferentially click on posts about baked goods! I've seen the numbers!!). Good deal.
My blogiversary resolution: Better photography! Because really what is a food blog with mediocre photography? Lame, that's what! Anyone have experience with building a little lightbox?
So while I'm waiting for my dinner to bake up, I'll tell you about some amazing bread that I like to make -- mostly because one batch is two loaves. I'd also like to make sure you realize that this is pretty hands-off for breadmaking, and people think it is pretty impressive nonetheless. Even more so if you are eating a hunk of it while you are, say, standing on a frozen lake. :)
 Rosemary Parmesan Foccacia
ever so slightly tweaked from Cooks Illustrated magazine, September 2010
INGREDIENTS
Biga
1/2 cup (2 1/2 ounces) unbleached all-purpose flour
1/3 cup (2 2/3 ounces) warm water (100-110 degrees F)
1/4teaspoon instant or rapid-rise yeast
Dough
2 1/2 cups (12 1/2 ounces) unbleached all-purpose flour , plus extra for shaping
1 1/4 cups (10 ounces) warm water (100-110 degrees F)
1 teaspoon instant or rapid-rise yeast
Kosher salt
4 tablespoons extra-virgin olive oil
2 tablespoons rosemary
1/4 c. shredded parmesan cheese
coarse black pepper
INSTRUCTIONS
1. FOR THE BIGA: Combine flour, water, and yeast in large bowl and stir with wooden spoon until uniform mass forms and no dry flour remains, about 1 minute. Cover bowl tightly with plastic wrap and let stand at room temperature (about 70 degrees) overnight (at least 8 hours and up to 24 hours.) Use immediately or store in refrigerator for up to 3 days (allow to stand at room temperature 30 minutes before proceeding with recipe.)
2. FOR THE DOUGH: Stir flour, water, and yeast into biga with wooden spoon until uniform mass forms and no dry flour remains, about 1 minute. Cover with plastic wrap and let rise at room temperature for 15 minutes.
3. Sprinkle 2 teaspoons salt over dough; stir into dough until thoroughly incorporated, about 1 minute. Cover with plastic wrap and let rise at room temperature 30 minutes. Spray rubber spatula or bowl scraper with nonstick cooking spray; fold partially risen dough over itself by gently lifting and folding edge of dough toward middle. Turn bowl 90 degrees; fold again. Turn bowl and fold dough 6 more times (total of 8 turns). Cover with plastic wrap and let rise for 30 minutes. Repeat folding, turning, and rising 2 more times, for total of three 30-minute rises. Meanwhile, adjust oven rack to upper-middle position, place baking stone on rack, and heat oven to 500 degrees at least 30 minutes before baking.
4. Gently transfer dough to lightly floured counter. Lightly dust top of dough with flour and divide in half. Shape each piece of dough into 5-inch round by gently tucking under edges. Coat two 9-inch round cake pans with 2 tablespoons olive oil each. Sprinkle each pan with ½ teaspoon kosher salt. Place round of dough in pan, top side down; slide dough around pan to coat bottom and sides, then flip over. Repeat with second piece of dough. Cover pans with plastic wrap and let rest for 5 minutes.
5. Using fingertips, press dough out toward edges of pan. (If dough resists stretching, let it relax for 5 to 10 minutes before trying again.) Using dinner fork, poke surface of dough 25 to 30 times, popping any large bubbles. Sprinkle rosemary, parmesan, and black pepper evenly over top of dough. Let dough rest until slightly bubbly, 5 to 10 minutes.
6. Place pans on baking stone and reduce oven temperature to 450 degrees. Bake until tops are golden brown, 25 to 28 minutes, switching placement of pans halfway through baking. Transfer pans to wire rack and let cool 5 minutes. Remove loaves from pan and return to wire rack. Brush tops with any oil remaining in pan. Let cool 30 minutes before serving.
16 October 2011
yogurt spelt biscuits

Oh hi there, my dear friends over at my little corner of the Internet. Long time no see, eh? Apologies. Turns out there was a big meeting of geology nerds in town last week. I had been excited for this week since I moved here in August of 2007. I never realized how deeply involved I would get with organizing things for the meeting as I did. It was an awesome conference, and I rallied myself socially for FIVE days in a row! I then helped out with a post-conference workshop in my lab. All in all, the week was educational, intense, and nerdtastic. At times, I felt like a real scientist, which is weird, because I generally feel like too much of a noob to really be a part of the scientific community. All part of growing up, maybe?
I was also totally exhausted afterwards. I usually get all stressed out if I invite a dozen people over to our apartment, and as it turns out inviting all the geoscientists to my beloved city was just as proportionally stressy. There was also no time for cooking and/or blogging. As you may know, after about two days of travelling or whatever, I get pretty antsy if I'm not cooking. This past weekend has been spent reacquainting myself with my kitchen and participating in a little social detox. I've probably talked more to my dog and cat than any human in the past two days (husband included -- he was at the lab all day Saturday). I made a curry, pancakes, and spent way too much time trying out bulgur wheat for breakfast.
I also made biscuits, and photographed them for you! So let's get back to our regularly scheduled blog post, shall we? Turns out we go through yogurt in this household at a pretty unreasonable pace. For once, we've accidentally overbought it (unprecedented!), and I wanted to try and use up the embarrassingly large quantity of plain yogurt taking up space in my fridge. This is another creation from Super Natural Every Day by Heidi Swanson. They are surprisingly soft for a biscuit, and I love the flavor of the spelt. I would say they are almost salty too, so consider the salt added here as an upper limit. I would also like to let you know that bench scrapers are totally the bomb. The Oxo one is a favorite of America's Test Kitchen, and I agree that the engraved ruler on the side of it is totally critical. I don't know about you, but if someone tells me my biscuit dough should be 3/4" tall, I will be totally vigilant about it. And while I've got your attention, I want you to know that weighing your flour is the way to go. There are so many slick little kitchen scales out there (In other words, all the new ones that look like iPads. Oh man! Can there be an app for this??), so why not be super accurate about it?
Yogurt Spelt Biscuits
makes 12 biscuits
5 oz. spelt flour
5.5 oz unbleached all-purpose flour
1 1/2 t. kosher salt
1 T. baking powder
1/2 c. unsalted butter, cold and cut into little cubes
11 oz(~1 1/3 c.) Greek yogurt
Preheat the oven to 450 F with a rack in the middle of the oven. Place an ungreased baking sheet in the oven to preheat as well.
Combine the flours, salt, and baking powder in a food processor. Sprinkle the butter across the top of the dry ingredients and pulse about 20 times, or until the mixture resembles tiny pebbles on a sandy beach. [The words of HS, not me! Such romantic food processing!] Add the yogurt and pulse a few times, or until the yogurt is just incorporated. Gather the dough into a ball and turn it out onto a lightly floured surface. Knead five times and press into an inch-thick square. Cut in half and stack one on the other. Repeat two more times -- flattening, stacking, and cutting. [This encourages a layered biscuit that's easy to pull apart] Add more all-purpose flour to prevent sticking when needed. Press or roll out the dough into a 3/4 inch thick rectangle, but no thicker; if the dough is too tall, the biscuits will tilt and tip over while baking. Cut the dough into twelve equal biscuits.
Transfer the biscuits to the preheated caking sheet, leaving 1/2 inch between biscuits. Bake for 15-18 minutes, until the bottoms are deeply golden and the biscuits are cooked through.
06 October 2011
farro soup with butternut squash and kale
 There are a lot of food bloggers that I admire. In particular, Heidi Swanson of 101 Cookbooks continues to knock my proverbial socks off. After my birthday I found myself wondering around in a bookstore (noooooo!), and they just so happened to carry her brand new cookbook. I took a peek at it, and totally fell in love. I wanted to make all of it, right then and there! It's pretty cool when you find a vegetarian blogger that has a similar cooking style (and I aspire to cook more like her too). I like food that is warm, solid, and healthy, and generally I like it most if it gets made in one pot. One jerk of a reviewer called it "roly-poly vegetarian". Do you just walk around gnawing on carrots straight out of your organically farmed soil? Sorry sir or ma'am, if you are that jerk and you are reading this, but I think you could find a better word for it. It's damn good food. I like it. I dig that I enjoyed a delicious dinner (and leftovers!), and it didn't occur to me until I was cleaning up that it was totally vegan. Pat on the back.
So farro. It's hip and trendy. From what I gather, it's a whole kernel of wheat. It cooks up pretty quickly and has a nice chewy texture. You can also substitute for it with barley (cheaper!).
Oh, and for the record, I also bought a book on Homemade Sodas. Between my newfound love of hoarding glass jars and filling them with simple syrups, and my darling new SodaStream, it was the right thing to do. More on these developments later.
Onto the soup!! I made a few adjustments, mostly to use what was in the pantry...
2 T. olive oil
2 yellow onions, chopped
2 c. peeled and diced butternut squash
kosher salt
2 T. curry powder
1/4 t. smoked paprika
1/4 t. garam masala
1/2 t. red pepper flakes
1/2 t. ground turmeric
2/3 c. farro
1 1/4 c. green lentils, picked over and rinsed
5 c. veggie broth
2 c. coconut milk
1 T. lemon juice
1/2 bunch of kale, large stems removed and cut into ribbons (I like dinosaur kale best, but that's probably just because it is dinosaur kale! RAWR!)
1/4 t. coarsely ground white pepper
Heat the oil in a large soup pot over medium-high heat. Stir in the onions and squash. Add a big pinch of salt and saute until the onions soften a bit, a couple of minutes. Add the spices and stir until the onions and sweet potatoes are coated and the curry is fragrant, a minute or so. Add the farro, lentils, broth, and coconut milk. Bring to a boil, decrease the heat to a simmer, cover, and cook for 50 minutes, or until the farro and lentils are cooked through (now's a good time to prep that dino kale). Taste and season with more salt if needed. 10 minutes before the simmer finishes up, add the kale so that it wilts and cooks down. After the 50 minutes, off the heat, and stir in the lemon juice and white pepper. You can serve it with a dollop of plain yogurt (or plain + salt + lemon zest), but the soup is mighty fine all by its lonesome.
---------------------------------
Now I'd better hurry up and learn to use my camera like a big girl blogger.
27 September 2011
broiler pizza
 |
| Left/upper: balsamic & olive oil with goat cheese, garlic, onion, and pear. Right/bottom: basil pesto with feta, parm, onion, and artichoke hearts. |
We're a pizza loving household. I don't really judge, as long as it isn't the microwavable kind that comes with the shiny cardboard disk that costs less than a dollar. Gross. But there is a certain satisfaction that comes from making your own pizza from start to finish. We always aspire to learn how to make our pizza on the grill, but we have yet to muster up the courage to give it a go. What if the toppings are lukewarm? What if I burn the crust? That would be tragedy for sure.
So here's our preferred method. It's pretty genius. Honestly, this is the main reason we began to really love our giant cast iron skillet. I knew I'd love it, but I hadn't figured out how one really takes advantage of a cast iron skillet. And now I know... it's good for everything! From cookies to cornbread to risotto. If you are also a little nervous about how to really use your cast iron skillet, I recommend this tutorial on how to care for it. It is all about the seasoning, folks. Don't be so thorough with the scrubbing, mmkay?
As far as the crust goes, we follow the directions for whole wheat pizza dough out of Baking Illustrated (but I am totally considering a pre-order for this lovely looking new pizza cookbook -- I know I know, you can decorate a pizza yourself, but hey, I'm not always so innovative! And fancy crusts! And they're from Minnesota! How can I resist such a thing?). The book says this will make you three medium pizzas, but we get four full skillet sized pies out of it. And the more pizzas you make at once, the more fun it is to decorate them! I like to make wacky pizzas and my husband is more of a red sauce traditionalist (also delicious, of course!). This way we both get what we like and are happy about leftovers the next day. Plus then I can be all vegetarian with my selections and he can enjoy a carnivorous meal. We are also a household that encourages leftovers. I swear I don't even remember how to make a PB&J anymore, I'm that addicted to making sure we've got leftovers for the next day. Sometimes that's what motivates me to get dinner made, not gonna lie to you.
So! Here's the crust recipe:
1/2 c. warm water (110 F)
2 1/4 t. instant yeast
1 1/4 c. water (room temp)
2 T. olive oil
11 oz. all purpose flour, unbleached (weigh it if you can for best accuracy!)
11 oz. whole wheat flour (weigh it if you can for best accuracy!)
1 1/2 t. salt
1. Measure the warm water into a 2-cup liquid measuring cup. Sprinkle in the yeast and let stand until the yeast dissolves and swells, about 5 minutes. Add to the room-temp water and oil and stir to combine.
2. Process the flour and salt in a large food processor bowl, pulsing to combine. Continue pulsing (long pulses!) while pouring the liquid ingredients (holding back a few tablespoons) through the feed tube. If the dough does not readily form into a ball, add the remaining liquid and continue to pulse until a ball forms. Process until the dough is smooth and elastic, about 30 seconds longer.
3. The dough will be a bit tacky, so use a rubber spatula to turn it out onto a lightly floured work surface. Knead by hand a few strokes to form a smooth, round ball. Put the dough into a deep oiled bowl and cover. Let rise until doubled in size, 2 to 2 1/2 hours.
4. Punch down the dough. Cut into four pieces. Flour a work surface and roll the dough out as thinly as possible.
(Follow instructions from the Crepes of Wrath, embedded above, to proceed with making some awesome broiler pizza! Go nuts with your toppings, and don't forget to report back with some smashing combinations!)
24 September 2011
hot cocoa mix

But at least it isn't those ultra-shamefully wasteful individual packets of cocoa mix. Come on Nestle, how do you know how much cocoa I need?! It is totally a matter of personal opinion, and probably also my mood. At work, we have a lovely off-site storage facility that does not have running water. Generally working out at that site involves a lot of thirst-generating activities of hauling stuff around. In our efforts to be cheap and green, we've installed a water cooler out there. It turns out there's a spigot for hot water too... which means tea and hot cocoa in the colder months (oh right, and it isn't heated either)! I decided that in the spirit of bulk goods that I would make a batch of cocoa mix for the lab.
Of course, I had to have a mug for myself at home first (just to make sure it worked out okay, right?).
So I made a tweaked version of Alton Brown's hot cocoa mix for starters. I'd say it worked out quite nicely! The only bummer is that the grocery store only sells one brand of dry milk, and it is nonfat. I think I'd go for something a little more... luxurious (?) if I could find it.
 |
| A mere serving suggestion. :) |
Here's what I used:
1 cup powdered sugar
1 1/4 cup powdered milk
3/4 cup cocoa
1/4 cup dark cocoa
1/2 t. salt
1 t. cornstarch
1 pinch cayenne
1 pinch cinnamon
Whisk ingredients together in a bowl until you are convinced it is homogenous (science buzzword!). Store in a pretty glass container with a tight fitting lid in the pantry. I would say 2-3 spoonfuls are fine for a standard mug, but that is totally your call, not mine!
14 September 2011
curried pumpkin risotto with chorizo spinach hash
I think this might be a first for me. I made something for dinner that required not one, but two whole components! At this rate, maybe I'll learn to appreciate side dishes or something. But I guess I shouldn't get too carried away here...
 Given that this post includes pumpkin and butternut squash, I suppose this will suffice as my entrance into autumnal cooking. Not gonna lie, when I started seeing posts like this one and this one popping up, I thought folks were being a bit preemptive. It was the first week of September! And sure enough, we had one more 87 F day (okay, and yes, in contrast, it is currently 45 F outside this morning), which proves that we weren't quite there yet. After all, the first day of fall is actually September 23rd. So if you'd like to follow suit, get yourself some hot chocolate, bake some bread, or at the very least, make something with cinnamon and/or nutmeg in it. :)
So check out this recipe. It is pretty intense, and probably hits my uppermost limit of seasoning. But I have to admit, adding pumpkin to risotto is a great idea. If I made the risotto by itself (this probably will happen someday!), I'd add some blue cheese at the end. By the way, you really only need half of the butter they call for. 4T. for 1 c. of arborio rice is totally excessive, so 2 T. butter and maybe 1 T. olive oil will do the trick. Also, I used veggie chorizo here and a giant bag of spinach because that's what I had. I hope to try this with kale or chard sometime. Or really, I'd just like to learn to appreciate kale. And beets. Maybe together someday? Any suggestions out there? I'd love to hear about them.
04 September 2011
marbled nutella banana bread

Well this just makes sense: why make an entire Nutella and banana sandwich when you can have all those things at once? Perfection. Many thanks to my buddy who posted this recipe. You know who you are, and I'd love to hear some more awesome recipes that require Nutella anytime!
This was pretty fun to put together really. I think it would be really fun to make with kids -- you can let them do the swirling part! I don't think I did a very good job. I was a hesitant swirler. But it's not like it came out poorly or anything. So if you like the way mine turned out, don't swirl it up much.
Enough about swirling! This is the last time I type the word swirl in this post! Ahem. So. I did in fact go to the Great Minnesota Get-Together on my 27th birthday, and I sure did try that sweet corn ice cream. It was marvelous! The texture was perfect and custardy, but there were little crunchy roasted corn nuts (or something) every once in a while and that made it even more interesting. I really liked that it was mainly a smooth ice cream. I will try to recreate it one of these days before fresh corn season goes bye-bye, but it will be hard to top!
I was also a total girl and got the Northwoods salad on a stick. I had to fulfill all the state fair food groups (fried, dairy, sugar, on-a-stick) somehow! It was basically a caprese salad on kebabs served over a wild rice and orzo salad. Not bad though!
28 August 2011
doughnuts

My #1 tip for you: Use an electric fondue pot for frying the doughnuts. You can control the temperature much more easily that way, and it turns out the maximum heat output on my pot brought the peanut oil to the ideal doughnut frying temperature! Note: do not dunk your fingers in the hot oil. It will make you swear uncontrollably.
Tip #2: Use wooden takeout chopsticks to flip the donuts in the oil, and a slotted spoon works best for transferring them out of the oil to the cooling rack.
Tip #3: Use biscuit cutters to shape your dough. Use a 2 1/2" diameter circle for the doughnut and 1 1/4" diameter circle for the holes (thanks, Baking Illustrated!). I know it looks wimpy when you cut them this way (see below), but remember after the second rise they will be just as fluffy as you'd anticipated.
Tip #4: Make half batches of all the glazes and toppings so you can make some of each without wasting too many ingredients. I did 9 cinnamon sugar doughnuts (plus 33 holes), 9 glazed, and 9 chocolate glazed. For chocolate glaze (so necessary in my opinion), heat up 1/4 c. half and half and add 2 oz. of semisweet chocolate chips, and then whisk until smooth. Then add confectioner's sugar until you get the best consistency (around 1 cup). Thanks again, Baking Illustrated!
Tip #5: Being the way that I am, I couldn't leave the basic recipe alone. My secret: cardamom in the dough. The recipe calls for nutmeg, or cinnamon if you don't like nutmeg (for shame!). I read about cardamom doughnuts and couldn't resist, plus it is one of my favorite spices this year.
Tip#6: Sprinkles, people! Come on!! They're doughnuts! Peanut butter? Jelly. Macaroni? Cheese. Hugs? Kisses. Doughnuts...? Sprinkles.
 |
| Oh noes! Doughnuts without holes! Don't worry, I'll get on that. Just appreciate the potential for delicious filled doughnuts looks like this. Maybe next time... |
 |
| With holes removed (and set aside), pre-rise. See, they look wussy here. Fret not! |
 |
| Risen and ready to be fried! |
 |
| For cinnamon-sugar doughnuts, you roll them in your mix straight out of the oil. |
 |
| Finished product! Do not scoff at the cinnamon-sugar variety, they are just as tasty! |
 |
| Glazed doughnuts are yummy, too. Once the doughnuts have cooled, dunk them in glaze and them wait for them to set before serving. |
24 August 2011
fresh corn and basil oil risotto
 Oh man I have no idea how long it has been since I've shucked corn. What a great word -- shucks! I think I'll have to integrate "Aw, shucks!" into my usual rotation of favorite everyday phrases. This was also the first time I've ever zipped the corn off of the cob. I think the last time I ate fresh corn off of the cob was when I had braces. As a result, I have a serious appreciation for my folks doing this for me when I was a teenage brace face. I had no idea it was so hard to do tidily! Does anyone have a slick way to shave off the corn without firing it all over the kitchen? I've been told I can't have a doodad for this purpose (and rightfully so -- I don't think I can manage to keep many more silly gadgets around for a task I only need to worry about a month or two out of the year). So yeah, sweet corn is great. It is even better when you meet the farmer and he looks you straight in the eye and tells you he picked it that very morning. I'm looking forward to finding new ways to enjoy it, particularly because of food52's recent Corn off the Cob Contest. I've also heard a rumor that one of the new foods for the Minnesota State Fair this year will include sweet corn ice cream! I am totally sold and my assumption is that it will taste like Corn Pops. Maybe I'll finally get the risotto on a stick this year too. :)
 Fresh Corn & Basil Oil Risotto
(adjusted from Cooking from the Farmer's Market to use the market goods in my pantry)
1/4 c. olive oil
1/4 c. fresh basil leaves, packed
2 T. butter
1 1/2 c. arborio rice
1 small white onion, diced
1/2 c. scallions, white and light green parts chopped
3-4 ears of fresh sweet corn
4 c. veggie broth
salt and freshly ground black pepper
1. Tear up the basil and soak it in the olive oil.
2. Heat up the broth in a saucepan with the lid on. You just want it to be warm, simmering at the most.
3. Melt the butter in a large heavy skillet over medium heat.
4. Add the onions and scallions, stir to coat with butter, and cover for 4-5 minutes until translucent on medium-low heat.
5. Add the rice and stir for 3 minutes on medium heat (keep it there now). You'll see the rice turn clear around the edges.
6. Add 1/2 c. of hot broth to the skillet. Stir continuously. When the liquid is absorbed, but before the rice is dry, add another 1/2 c. of broth. Keep doing this for 10 minutes.
7. Add the corn (yay!), and continue adding liquid 1/2 c. at a time for another 10 minutes. I find the absorption rate of the rice decreases over the course of the 20 minutes of stirring (you may need a substitute stirrer at some point. Offer to trade with ladling broth; it seems fair!).
8. Turn off the heat and add the basil oil.
9. Serve and enjoy!
21 August 2011
southwestern-style potato salad
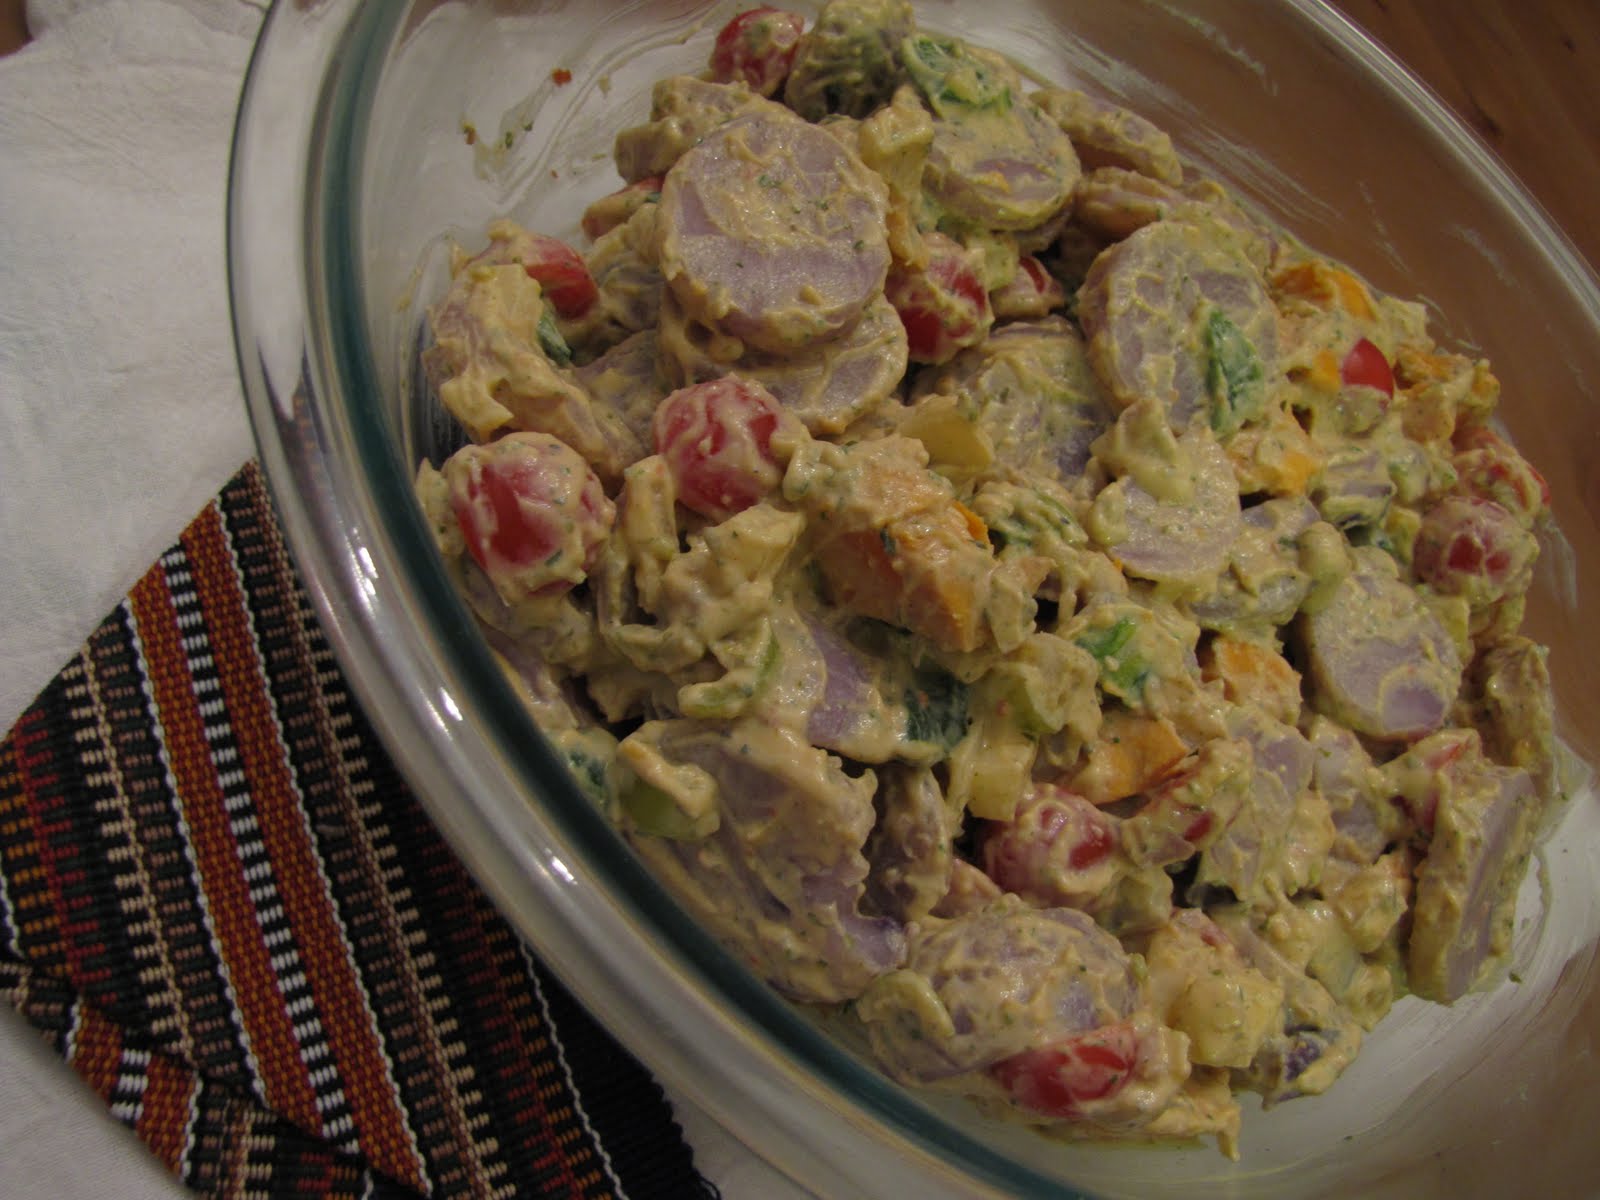
So I really wanted to make this a little while ago, but the purple potatoes that I bought liquified in the pantry in three days (I blame the July heat). The coolest thing about this creamy potato salad is that it doesn't include mayo. The solution to mayo-free potato salad? Silken tofu! You know, the kind in a box on a shelf? That's the stuff. Now potato salad is safe for vegans and mayo-phobes, and it tastes super delicious!
I also dig anything with chipotle in it. Much to my husband's relief, I have learned that just because it comes in tiny cans with adobo sauce doesn't mean one can equals a reasonable addition to a recipe (whoopsie!). Here's a tip: I blended a whole can's worth of chilis and adobo sauce in the Magic Bullet, and then froze 1 T. blobs of it on parchment paper on a cookie sheet, then stuck them in a freezer bag for storage. Now you don't have to feel obligated to use a whole can :). This trick is also great for homemade pesto (minus the cheese) and tomato paste.
So here you go:
Southwestern-Style Potato Salad
(slightly adapted from Southern Style Three-Potato Salad in Passionate Vegetarian)
1 large sweet potato
3 lbs. small purple potatoes
1 T. ground cumin
2 Hungarian wax peppers; stem, seeds, and ribs removed, finely diced
1 poblano pepper; charred, peeled, seeds removed, diced
1 small white onion, finely diced
1 box silken tofu
2 cloves garlic, peeled and quartered
2 T. extra virgin olive oil
2 T. lime juice
1 T. chipotle pepper in adobo sauce
1 t. salt
handful of cherry tomatoes, halved
3 T. fresh parsley
3 T. fresh cilantro
1. Prick the sweet potato with a fork and cook in the microwave, about 5 minutes. Let cool and peel.
2. Bring a large pot of water to a boil. Salt the water and then boil the purple potatoes, skin on, for 15 minutes.
3. Put peppers, onion, and cumin in a bowl. Stir to combine and coat with cumin.
4. Combine the tofu, garlic, olive oil, lime juice, adobo chili paste, salt, cilantro, and parsley in a food processor until smooth. Stir the mixture into the peppers. Slice the purple potatoes into 1/2 inch thick discs (the skins will fall off, that's fine) and dice the sweet potato. Add the potatoes to the pepper and tofu mixture and toss to combine. Add the tomatoes and toss gently to combine.
09 August 2011
zucchini bread
 Remember how I said I bought zucchinis when I meant to pick up some cucumbers? Well, I figured out what to do with a ton of zucchinis: First, I made zucchini burgers. They were pretty fun, and involved ground flaxseeds, TVP, nutritional yeast, and balsamic vinegar, but didn't use much zucchini. I needed to find something else to make as well...
I pondered this for far too long. So long that I'm surprised the zucchinis hadn't gone bad, or even iffy. I was home, the weather had cooled down and the humidity had dropped, and I pined for a reason to use the oven. Solution: zucchini bread! I'd never made it before, and my trusty copy of Baking Illustrated did not disappoint me.
On a side note: have you ever tried to make something from a cookbook, and were disappointed when yours didn't come out as nicely? Well, how's this for consistency: another blogger that I follow used the same recipe, and our results are nearly identical! Well, except for the fact that her photos are way cooler than mine. But if you can get past that, they look a lot alike, right?
Zucchini Bread
from Baking Illustrated
Makes 1 loaf
2 cups (10 ounces) unbleached all-purpose flour, plus more for dusting pan
1 pound zucchini, washed and dried, ends and stems removed
¾ cup (5¼ ounces) granulated sugar
½ cup walnuts, chopped coarse
1 teaspoon baking soda
1 teaspoon baking powder
½ teaspoon salt
¼ cup plain yogurt
2 large eggs, beaten lightly
1 tablespoon lemon juice
6 tablespoons (¾ stick) unsalted butter, melted and cooled
1. Adjust an oven rack to the middle position and heat the oven to 375 degrees. Grease the bottom and sides of a 9 by 5-inch loaf pan; dust with flour, tapping out the excess.
2. In the bowl of a food processor fitted with the metal blade, process the zucchini and 2 tablespoons of the sugar until the zucchini is coarsely shredded, twelve to fifteen 1-second pulses. Transfer the mixture to a fine-mesh strainer set at least 2 inches over a bowl and allow to drain for 30 minutes. Alternatively, you can shred the zucchini (don’t cut into 1-inch pieces) on the large holes of a box grater, toss with the 2 tablespoons of sugar, and drain. (Word to the box grater! So satisfying. For draining, I put the shredded zucchini in a fine-ish mesh strainer over a mixing bowl, then put a piece of plastic wrap on top of the zucchini, and then sat a heavy saucepan on top of it for 30 minutes.)
3. Meanwhile, spread the nuts on a baking sheet and toast until fragrant, 5 to 7 minutes. Transfer the nuts to a cooling rack and cool completely. Transfer the nuts to a large bowl; add the flour, baking soda, baking powder, and salt, and whisk until combined. Set aside.
4. Whisk together the remaining ½ cup plus 2 tablespoons sugar, yogurt, eggs, lemon juice, and melted butter until combined. Set aside.
5. After the zucchini has drained, squeeze the zucchini with several layers of paper towels to absorb excess moisture. (Yes, there will be more moisture. Liquid, even. Lots of it! Squeeze!!) Stir the zucchini and the yogurt mixture into the flour mixture until just moistened. Scrape the batter into the prepared pan and smooth the surface with a rubber spatula.
6. Bake until the loaf is golden brown and a toothpick inserted in the center comes out clean, 55 to 60 minutes, rotating the pan halfway through baking. Cool in the pan for 10 minutes, then transfer to a wire rack and cool for at least 1 hour before serving. (The bread can be wrapped with plastic wrap and stored at room temperature for up to 3 days.)

03 August 2011
chocolate mint brownies

I would very much like to bake things. Classic, right? I want what I can't have. At least I don't want to make soup, because that would make me certifiably hard to please. At least I know I'm not alone -- my husband commented about how he can't wait for fall or winter so that we can bake lots and lots of bread. :) So here's a recipe that involves brownies and peppermint patties, which is a fine combination. I have been holding out on you... I baked these last time it was reasonable to run the oven for a while... you know, early June? We then hoarded them in the freezer (I mean, I didn't even tell you guys about them!) and didn't share them much at all. A quick 20 second zap in the microwave, and you've got ooey-gooey brownies and the oven isn't even on.
It is true though... the ten day forecast here in Minnesota is looking mighty fine, and the lowered humidity is making me feel much more like a human and way less like a slug. Maybe I'll just have to stay up late tonight and bake some biscuits and drink a gin & tonic, because I can!
What?? I see your disapproving brows. I am out of breakfast food as a matter of fact -- I've got to make something then I suppose, eh?
27 July 2011
lemon-scented quinoa salad

26 July 2011
almond-orange biscuits
Well it sure seems like food-with-strawberries-on-top is my theme for blog pictures at the moment. My husband and I have a deal that as long as strawberries are cheap, we are going to keep buying them and eating them, and there will be no complaining. I know that two months from now we'll be sad little puppies when we see the cost of them, and we'll be stuck with frozen strawberries to put in smoothies until next June. So yeah, no complaining!
 These biscuits were a part of a series of new recipes that I tried that required as little cooking as possible. We had a really stupid heat wave here, and our tower fan in the kitchen can only do so much. Ambient temperature in the apartment never really dropped below 85 F during the day for a week or so. Gross! We made cold soba noodles (the only cook time is a 5-minute noodle boil), potato salad with white and green beans (15 minutes of boiling time total), smoothies (natch!), and another cold salad that I promise to post as soon as I've got the pictures uploaded properly. The biscuits are a quick bake, so it isn't too bad if you really, really want to bake something. Plus you can always leave the room while baking something, perhaps to go take an ice cold shower, right? All in all, perhaps it was good that I was forced to try out some new recipes, even if conditions were less than fun. It was, however, definitely good that my husband reminded me that daiquiris go down especially well when it is so danged hot outside too. :)
So I didn't take a picture of this, but for serving, I recommend a nice goat cheese (the one I had was a honey-goat cheese) with some balsamic vinegar as well. If I'd remembered to clip some leaves from our mint plant, I would have sliced those up and tossed them in too. Don't tell me that I have fancy pants, because I really don't.
Almond-Orange Biscuits
adapted from Pecan-Orange Biscuits in 1,000 Vegetarian Recipes by Carol Gelles
1 1/4 c. all-purpose flour
3/4 c. whole wheat flour
1/2 c. ground almonds
2 T. sugar
1 T. baking powder (yes, really!)
1/2 t. salt
3 T. butter
3/4 c. orange juice (uhhh, I took the grated orange and blended it. That's OJ, right?)
1 T. orange rind
2-3 large strawberries, cut into thin slices perpendicular to the stem
1. Preheat oven to 400 F. PAM a cookie sheet covered in foil. (I can has Silpat?)
2. In a large bowl, stir together both flours, the pecans, sugar, baking powder, and salt.
3. Using a pastry blender (yes! I mostly use mine as a potato masher!) or two knives, cut the butter until mixture resembles coarse cornmeal.
4. Stir together the orange juice and the orange rind. Add to the flour mixture and stir until juice is absorbed.
5. Knead in the bowl 10-12 times until dough forms a ball. Roll out the dough to 1/2-inch thickness and cut with 3-inch biscuit cutters and place on prepared baking sheet. (These are the official directions. I pushed the dough evenly into an 8x10 Pyrex and cut the biscuits into 2 1/2 inch squares instead.)
6. Place a strawberry slice on top and push into the biscuit a bit.
7. Bake 18-20 minutes or until lightly browned on top.
14 July 2011
lemon & rhubarb cornmeal pancakes
I just spent a lovely weekend in the Windy City with a dear friend (Who says 'dear friend'? What is this, my memoir from the 1850's?!) from college. It was so great to catch up together, but even better that we caught up while cooking up a storm! It's pretty special that that's all it took to make it an enjoyable weekend. We endeavored to make ourselves dessert my first night in town, and it turned out that was a very good call. Later we shared cake with some other pals from college on the beach. It was pretty danged ideal.
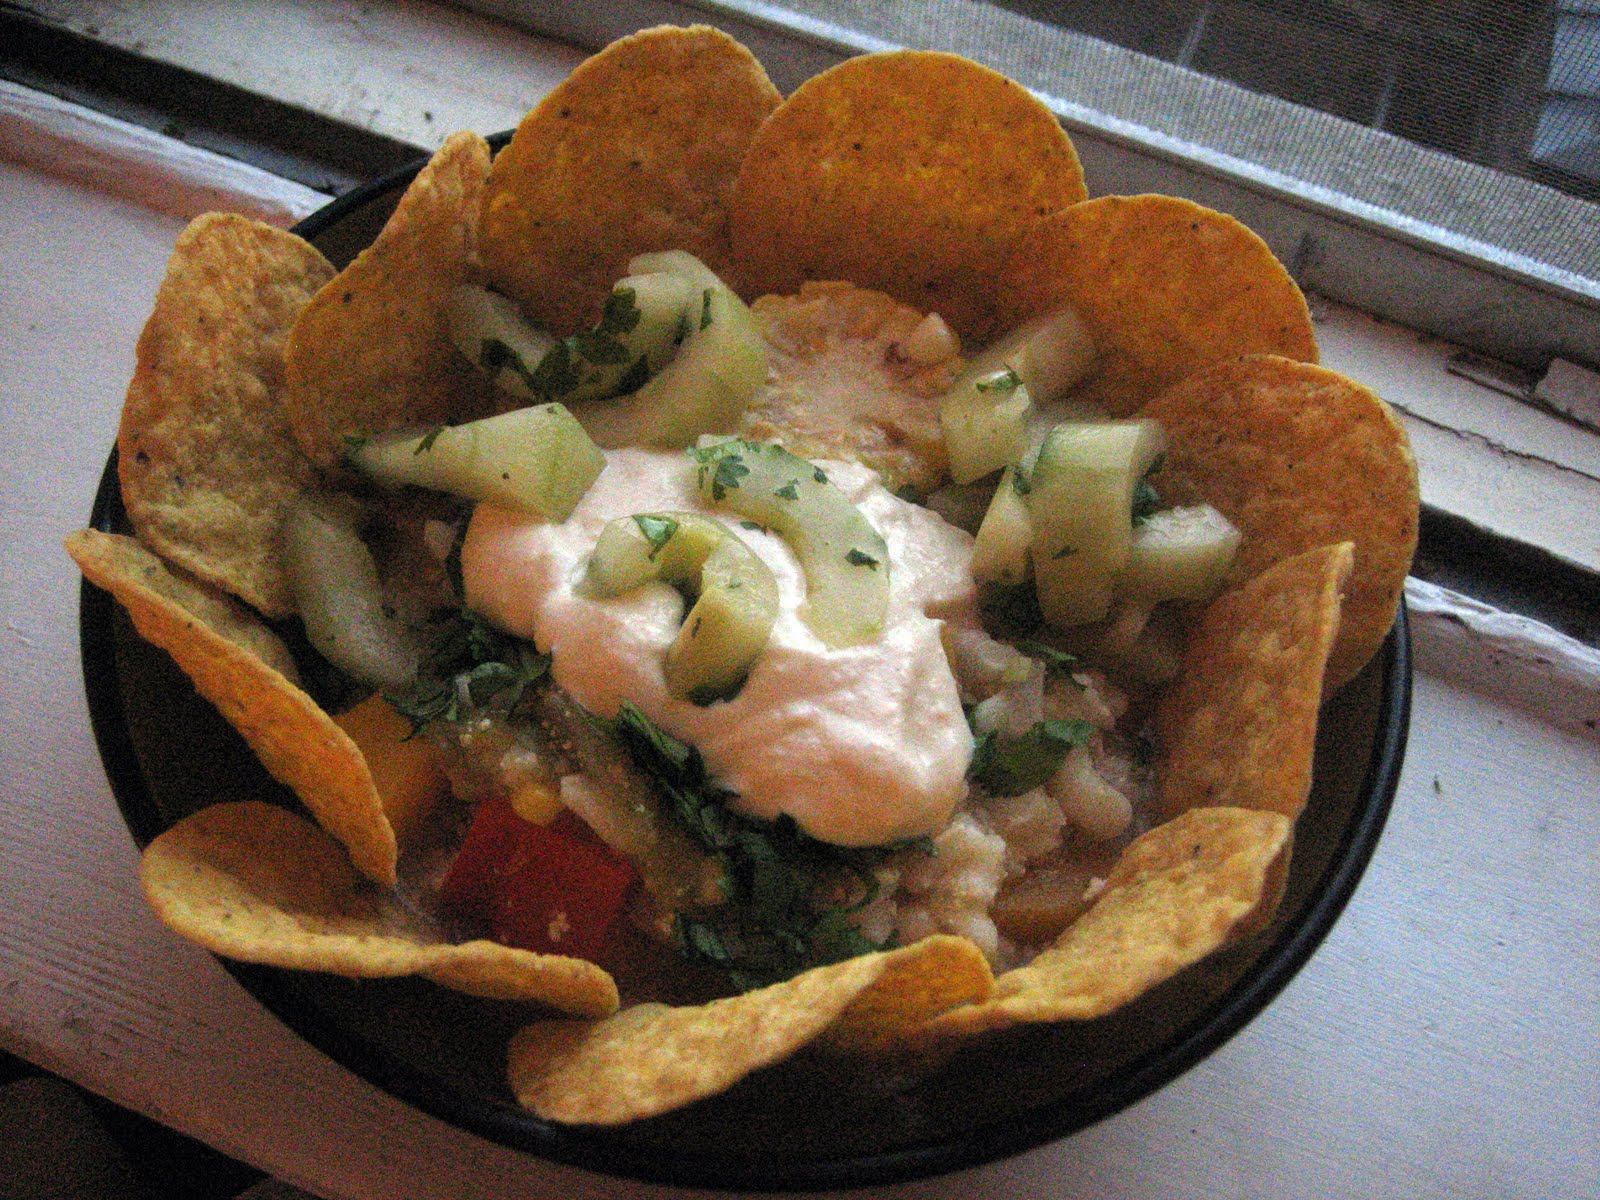
We even made dinner -- a vegan feast from a cookbook that has never let my friend down: hominy, tomatillo, and squash stew with ginger-lime tofu "cream" on top and lime-marinated cucumber spears served with tortilla chips. It was so good that I had to take a picture of it!
But this post is about pancakes. I know, I know, I've posted pancake recipes before, but you should all know by now that pancake-making is serious biz in this home. This variation was a joint innovation by my husband and me. I think the texture of these pancakes were perfect and that's why I liked them so much. I also liked that it used up the rest of the cooked rhubarb that we had sitting around. I also liked eating them at room temperature on the 7AM bus to Chicago the next day. I think the guy sitting next to me had a hard time hiding the shocked look on his face when I pulled a bag of pancakes out of my purse. Be prepared, dude-man. I suppose he was never a scout.

 |
| Apologies for the grainy photo; I only had our tiny old point and shoot with me. |

Lemon & Rhubarb Cornmeal Pancakes
recipe by TofuSurprise
1 c. all-purpose unbleached flour
3 T. corn starch
4 T. cornmeal
1/2 t. baking soda
1/2 t. baking powder
1/2 t. salt
1/2 c. cooked & sweetened rhubarb (leftovers from making rhubarb syrup)
zest of one small lemon
1 egg
3/4 c. milk + 1 T. lemon juice, whisked together (or 3/4 c. buttermilk if you've got it)
2 T. unsalted butter, melted
1 t. vanilla
1/4 c. milk
mascarpone cheese (optional)
fresh strawberries, sliced (optional)
maple syrup (THE REAL DEAL PEOPLE!)
1. Combine all dry ingredients in a medium bowl, mix with zest.
2. Combine all wet ingredients in another bowl.
3. Add ~ 1 cup of wet ingredients to Magic Bullet and blend with the rhubarb. Return to the bowl with the rest of the wet ingredients.
4. Add the wet ingredients to the dry ingredients and stir until just combined.
5. Preheat oven to 200 F with a cookie sheet inside of it.
6. Preheat a griddle to medium heat.
7. Add ~1/4 to ~1/3 cup of batter to the griddle (should fit 4 pancakes). Cook until edges look a bit dry and popped bubbles do not refill with batter (no more than 2 minutes).
8. Flip pancakes, cook 45-60 seconds.
9. Place finished pancakes in the oven as they are ready to keep them warm. Now you can serve all of them at the same time! Yay!
10. Assemble pancakes with mascarpone cheese and sliced strawberries and drizzle with maple syrup. Or whatever suits your fancy I suppose. Pancakes!!!
Subscribe to:
Posts (Atom)